
The Shark Spartan GT is a full-face sport-touring helmet, and its visor (shield) is held at each side by a small locking pin that you pivot by hand. Shark Spartan GT visor removal takes no tools: open the visor slightly, line up the circle on the visor with the circle on the shell, pivot each locking pin forward and pull the visor towards the front. This guide follows the steps in Shark’s own owner’s manual for the Spartan GT, then covers refitting, a loose visor and the internal sun visor.
Aftermarket visors for Shark helmets

The short answer: press the button and lift the visor slightly until the circle on the visor lines up with the circle on the shell. Pivot the locking pin on one side towards the front, repeat on the other side, then pull the visor forward and away. To refit, push the visor into its slots at a slight angle until it clicks, realign the circles, press and pivot each locking pin backward, and close the visor.
Spartan GT, GT Pro or GT Carbon: check the name on your helmet
Shark has sold several helmets under the Spartan name, including the Spartan GT, the Spartan GT Pro, the Spartan GT Carbon and the Spartan RS. This guide is about the Spartan GT, and it makes no claim that any of those helmets share a visor. The model name is printed inside the helmet, on a label under the lining or on the chin strap.
A visor is shaped for one shell opening and one pair of side mechanisms, so the exact model matters more than the family name. Shark’s manual for this helmet names its original visor as the VZ300, which gives you a second thing to check against.
- Read the label. Match the full model name, including GT, GT Pro or RS, not just the word Spartan.
- Look at the old visor. Compare its outline, the shape at each side mechanism and the button area with the listing photo.
- Read the listing’s model list. Order only a visor whose listing names your helmet. A listing that names several Shark models is not proof that those helmets share a visor.
The visors we list for this helmet sit in our Shark Spartan GT visor range. If you are not sure which helmet you have, the visor finder narrows it down by brand and model.
How the Spartan GT visor is held: the button, the circles and the locking pins
Shark’s anatomy page for the helmet labels the parts you will touch: “1) VZ300 visor”, “2) Sun visor”, “3) Sun visor activation button” and “7) Visor grip and air stream”. The visor grip is the button you press to release the visor from its closed position before you lift it.
At each side of the shell there is a locking pin and a small circle marked on the shell, with a matching circle on the visor. The circles are a position guide. When they line up, the visor is at the one angle where the locking pins can be turned and the visor can slide in or out of its slots.
Pivoting a locking pin forward releases that side, and pivoting it backward locks it. No screws hold the visor in, which is why the job needs no tools. The manual describes the original visor plainly: “This visor is made of injected polycarbonate.” Polycarbonate scratches easily, so handle the visor by its edges once it is off.
What you need before you start
You need no tools to take the visor off or put it back, so the preparation is mostly about a clean, steady place to work.
- A towel, or the helmet bag, so the shell sits still and stays unmarked
- Two microfibre cloths, one dry and one lightly dampened
- Warm water with a little mild soap
- The new visor, still in its protective film
- Good light, so you can see the circles and the locking pin on both sides
The only tool the manual mentions near the visor is an Allen wrench, and that is for adjusting how stiffly the visor moves, not for removing it. Rest the helmet on its towel with the chin bar towards you, and take off any ring or watch that could scratch the shell or the new visor.
Shark Spartan GT visor removal, step by step
The steps below follow the “Removal of the screen” page of Shark’s Spartan GT owner’s manual. Our own listings give a shorter, generic method that starts from fully open. For this helmet, follow the manual, which starts from a slightly open visor with the circles aligned.
- Open the visor slightly. Shark’s first instruction is: “Slightly open the visor by pressing the button, then lift.” Raise it only a little, not all the way up.
- Line up the circles. The manual adds: “The circle on the visor must be aligned with the circle on the shell.” Move the visor up or down a fraction until the two circles sit together on that side.
- Pivot the first locking pin. In the manual’s words: “Next, pivot the locking pin toward the front.” That side of the visor is now released.
- Repeat on the other side. Check that the circles are aligned there too, then pivot the second locking pin towards the front.
- Pull the visor away. Shark’s last removal step is: “Remove the visor by proceeding with a pulling motion toward the front.” Ease it out evenly on both sides and lay it inside face up on a clean cloth.
If the visor will not come away, the usual reason is that the circles have drifted apart on one side. Re-check both sides, and never lever the visor out with a screwdriver, a key or a coin, because a broken locking pin costs more to sort out than any visor.
While the visor is off: the slots, the pins and the seal
This is the one moment you can reach every part that decides how well the visor moves and seals. Road grit in the side slots makes the visor stiff, and dirt on the rubber seal stops it closing tight against the shell.
- Wipe the side slots and the locking pin on each side with the damp cloth, working gently into the recesses.
- Check that each locking pin still pivots freely and returns to its forward position without catching.
- Wipe the rubber seal right round the opening. Our guide to cleaning a motorcycle visor seal goes through that part in more detail.
- Dry everything with the second cloth and let it air for a few minutes.
Keep to water and mild soap. Shark’s opening warnings say: “Only use mild soap, warm water and a soft cloth to clean and wipe both the helmet and visor.” The same manual says never to use “gasoline, petroleum products, chemicals or any solvent” on the shell or the visor.
Fitting a replacement visor
Refitting is the removal in reverse, with the circles doing the same job. Hold the new visor by its edges and leave the protective film on until it is in place.
- Start at an angle. The manual says: “Introduce the visor into its slot in a slightly inclined position.” Feed both sides in together, keeping the visor square to the shell.
- Push it home. Shark says to insert the visor fully into its slot and keep pushing until it clicks. Do not stop at the first resistance.
- Realign the circles. The manual’s next words are: “Realign the circle on the visor with that on the shell, just like during removal.”
- Lock each side. Then: “Now press and pivot the locking pin backward in order to lock the visor.” Repeat this on the other side.
- Close the visor. Lower it until it locks shut, then peel the film from both faces.
Shark is direct about getting this right: “WARNING! If you are not sure that you properly replaced the visor, do not use the helmet.” The manual explains that a badly fitted visor could come away while riding. If a locking pin will not pivot backward easily, take the visor off and start again rather than forcing it.
Testing the visor before you ride
Do these checks at home, not at the side of the road. A visor that is locked on one side and not the other often looks right when raised and then closes at a slant.
- Both sides are locked. Each locking pin should be pivoted backward, matching the other side.
- It travels smoothly. Raise and lower the visor several times. It should move evenly on both sides with no tight spot.
- It locks shut. Closed, the visor should lock at the button and meet the rubber seal along the whole edge with no visible gap.
- The view is clear. Check that the film is off both faces and that nothing distorts your view straight ahead or to the sides.
The manual also warns against opening the visor at speed: “While riding at highway speeds, do not ride with an open visor and do not try to open the visor.” A visor you have just fitted is the one to test most carefully before that ride.
A loose or stiff visor: the friction adjustment
A new visor can feel a little looser or stiffer than the one it replaced, and the Spartan GT has a setting for that. The manual says to use an Allen wrench to adjust visor hardness and friction, and gives the rule in five words: “Screw tighter to harden, unscrew to relax.”
Before you reach for the wrench, rule out the fitting itself. A visor that flops or drops on its own is far more often half-locked on one side than badly adjusted. Take it off, check that both sides click fully into their slots, realign the circles and pivot both locking pins backward again.
Adjust in small steps and test after each one. If the visor still will not hold its position, or will not close against the seal, do not ride on it. If a correctly fitted visor whistles or lets in air, our guide to motorcycle visor wind noise covers the usual causes.
Removing the internal sun visor
The Spartan GT also carries a drop-down internal sun visor, and riders often take it out to clean it while the main visor is off. Shark’s manual gives these steps:
- “Place the sun visor in its low position.”
- “Move the sun visor as indicated by the arrow to release the hook.”
- “Gently pull the sun visor downward.”
- “Detach the sun visor by the side.”
Refitting is the reverse. Move the sun visor’s handling button to the low position, clip the sun visor on at one side and then the other, then press the central fixing button with a small pointed tool and lift the sun visor slightly so it clips back on. The manual repeats one rule throughout: “NEVER ride with the sun shield as eye protection.” Our comparison of a photochromic visor and an internal sun visor explains how the two differ.
Choosing a replacement visor for the Shark Spartan GT
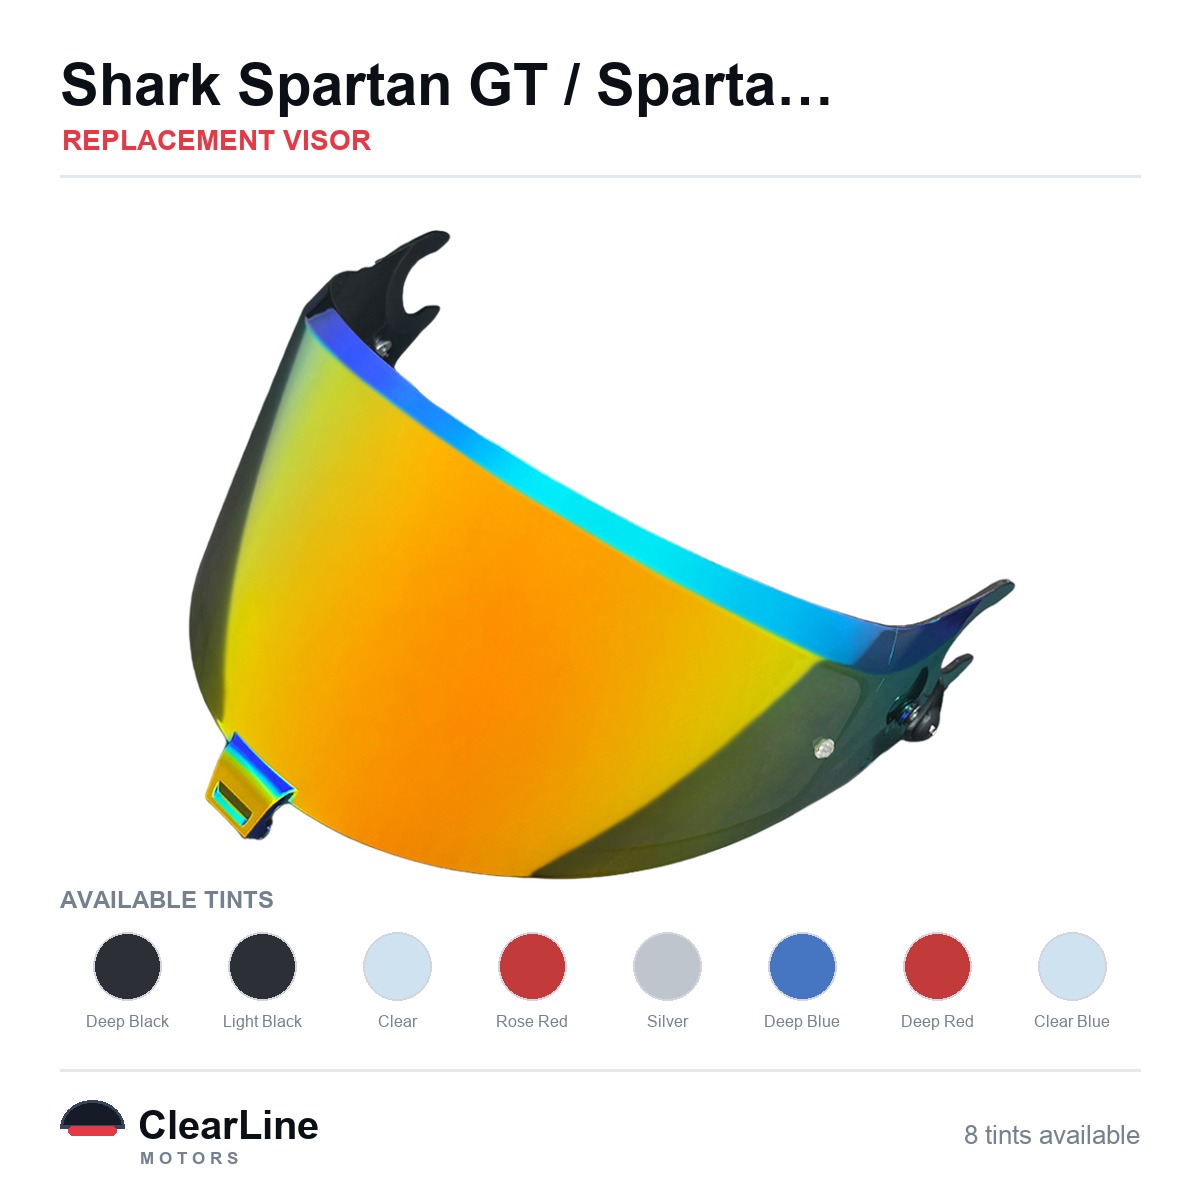
The two visors below list the Spartan GT by name and sit in its range. Their listings also name other Shark models, which is supplier listing data, not proof that those helmets share a visor. Read each listing’s model list before you order.
| Part | What it is for | Read more |
|---|---|---|
| Replacement visor for the Shark Spartan GT | Replacing a scratched, hazed or scuffed visor, with clear, light tint, dark and mirrored options | clear replacement visors explained |
| Photochromic visor for the Shark Spartan GT | A visor that darkens in bright sun and turns near-clear again as the light drops | how photochromic visors work |
Shark’s manual is direct about which visor it expects on this helmet: “Only the visors, which have been approved N° E11 050670 and marketed under SHARK’s reference VZ300 can be used with this helmet.” Our visors are aftermarket parts, not Shark’s own, so read the marking on any visor you fit before you ride on the road with it.

Once a visor is badly marked, its optical quality is gone, and rule 84 of the Highway Code rules for motorcyclists explains why that matters: “Scratched or poorly fitting eye protectors can limit your view when riding, particularly in bright sunshine and the hours of darkness.” Light marks can sometimes be polished out, and our guide to removing scratches from a motorcycle visor explains where the line sits. For the wider choice, see our photochromic visor range.
Anti-fog on the Spartan GT: the air stream, the breath guard and inserts
Shark gives the Spartan GT two built-in ways to fight fog. The first is the air stream position. The manual says to open the visor slightly by pressing the locking button, then “Lower the visor once again in placing it against the button without applying any force.” That holds the visor just short of fully closed, which lets a little air reach its inside face.
The second is the retractable anti-fog breath guard inside the chin bar, which sits between your mouth and the visor. If you take it out to wash the lining, refit it. Shark is firm about the padding too: “NEVER use your helmet with any part of the interior padding removed.”
Anti-fog surfaces work by changing how moisture behaves on them. A 2022 materials study in Advanced Science, available on PubMed Central, explains that on a hydrophilic anti-fog coating “condensed water spreads into a pseudo‐film shape immediately to avoid fogging”, instead of forming droplets that scatter light. It is a laboratory paper, not a test of any visor or insert.
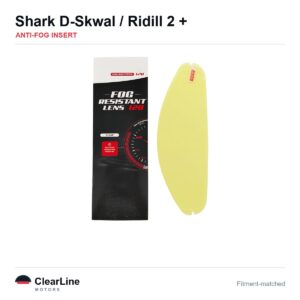
The anti-fog insert listed for the Shark Spartan GT fits behind the visor. Its product page says most of our inserts fit between two small pins on the inside of the visor, so check that yours has them. Fitting starts with taking the visor off, so the removal steps above are the first half of that job; then clean the inside with a dry cloth and follow the fitting guide in the pack. Our page on anti-fog visor inserts and our guide on how to stop a helmet visor fogging cover the wider options.
Tinted visors and the law in Great Britain
The replacement visor listed for the Spartan GT comes in dark, mirrored and light tint finishes as well as clear, so the legal position is worth knowing before you choose. In Great Britain the test is the marking on the individual visor, not its colour or the name of its tint.
The Motor Cycles (Eye Protectors) Regulations 1999 prescribe BS 4110 and require eye protection to carry an approved certification mark of an approved body. A visor is only road legal in GB if it carries that marking.
Iridium, mirrored and dark smoke visors transmit too little light to be legal for road use in Great Britain, day or night. Keep a visor like that for the track, and check the marking on any clear or light visor before you ride on it.
Selling eye protection for road use that is not of a prescribed type is an offence in itself under section 18 of the Road Traffic Act 1988. That is why ClearLineMoto never describes any visor as approved or certified: we do not check the marking on individual items. For more detail, read our guide to tinted visor law in Great Britain, and riders in the US can start with our guide to visor tint rules in the US.
Troubleshooting a Spartan GT visor swap
Why won’t the Spartan GT visor come off?
Most often the circle on the visor and the circle on the shell are not lined up on one side, so that locking pin cannot release. Open the visor slightly, align the circles on both sides, pivot both locking pins towards the front and pull the visor forward. If it still sticks, look for grit around the pin before trying again.
Why won’t the locking pin pivot backward after fitting?
The usual cause is a visor that has not been pushed fully into its slot, or circles that have moved apart while you worked. Push the visor home until it clicks, realign the circles, then press the locking pin as you pivot it backward. Do not force it; take the visor off and refit it if it still resists.
Why does the visor drop or feel loose after a swap?
Check first that both sides are clicked fully into their slots and both locking pins are pivoted backward. If the fitting is right, the friction setting is the next thing to look at. Shark’s manual says to use an Allen wrench: screw tighter to harden the movement and unscrew to relax it.
Looking after the new visor
Shark’s cleaning advice for this visor is simple: “We advise to use a soft rag with warm water and mild soap.” It also says not to use “any solvent, petrol, abrasive paste or similar products” for cleaning. Let the visor dry at room temperature rather than near a heater, and keep fuel and window cleaners away from it.
Rule 83 of the Highway Code asks riders to check before every ride: “Before each journey check that your helmet visor is clean and in good condition.” Shark puts it just as plainly in the same manual: “If your visor no longer provides you with clear visibility after a period of service, you must immediately replace it.” Our complete guide to cleaning a motorcycle helmet visor goes further on technique.
If you own more than one Shark helmet, our overview of visors that fit Shark helmets shows how the range is grouped, and our Shark Race-R Pro GP visor removal guide covers a Shark race helmet with a different mechanism. You can also browse our visors for Shark helmets model by model.
This guide was written by the ClearLineMoto team. ClearLineMoto is not affiliated with Shark, and every part we list is described by the helmet models it fits.
Visors and inserts mentioned in this guide
- Shark Spartan GT / Spartan GT Pro / Spartan RS Replacement Visor — Smoke, Clear, Silver Tints
- See the photochromic visor for the Spartan GT
- Anti-fog insert for the Shark Spartan GT
- All visors listed for the Shark Spartan GT
Frequently asked questions
Do you need tools to remove a Shark Spartan GT visor?
No. Both locking pins are pivoted by hand, and the visor pulls forward out of its slots once they are released. The only tool the manual mentions for the visor is an Allen wrench, and that adjusts the friction, not the fitting.
Why do the circles on the visor and shell have to line up?
The circles mark the one visor angle at which the locking pins can be pivoted and the visor can slide in or out. Shark’s removal and refitting steps both use that position. If the circles are apart, the pin will not release or lock properly.
How do you remove the visor from a Shark helmet like the Spartan GT?
On the Spartan GT, open the visor slightly with the button, align the circles, pivot each locking pin forward and pull the visor towards the front. Other Shark helmets use other mechanisms, so follow the manual for your own model.
Will a visor listed for another Shark helmet fit the Spartan GT?
Rely only on a listing that names the Spartan GT. A visor is cut for one shell opening and one pair of side mechanisms, and a listing that names several models does not prove they share a visor. Compare your old visor with the listing photo before you order.