
A dual-sport helmet asks more of its owner than a road lid does. On the LS2 Pioneer 2 the peak and visor share the front of the shell, and on a dirt section many riders take the visor off altogether and run goggles under the peak. This guide covers the LS2 Pioneer 2 peak and visor as one system: how each part comes off and goes back on, how they interact, and how to set the helmet up for road, trail and goggles.
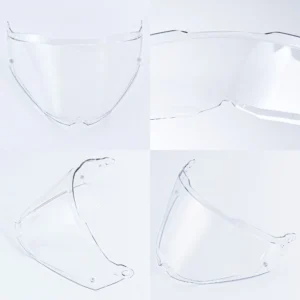
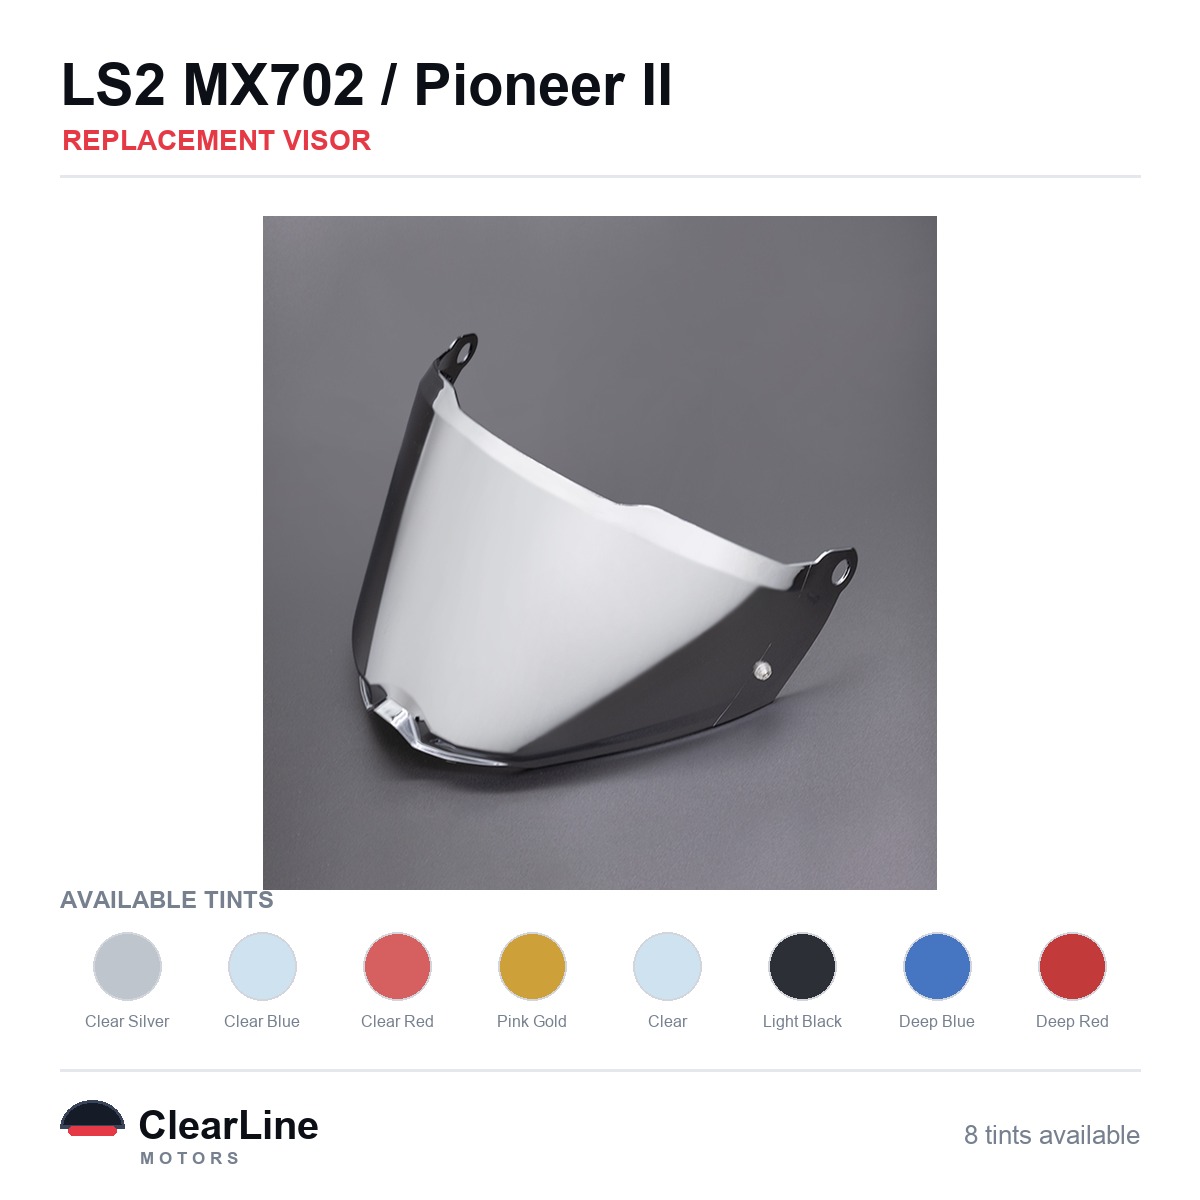
Aftermarket visors for the LS2 Pioneer II
Free 30-day returns for any reason: full refund, and we refund your return postage.
The short answer: treat the peak and the visor as two separate jobs. Set the peak angle with the visor closed so the two parts never touch, and remove the visor at its highest stop with the peak raised clear. For goggles, take the visor off, keep the peak on for roost and sun, and check the strap sits flat on the back of the shell before you ride.
How the Pioneer II front end is put together
The Pioneer II is an adventure helmet, which means it is built to be ridden three ways. Retail listings describe it with an adjustable, removable peak, a wide main visor and a drop-down sun visor that lives inside the shell. Each of those parts has its own fixings, and knowing which is which saves you from pulling on the wrong thing.
The peak sits on the outside of the shell above the eyeport. It is there to shade your eyes and to deflect roost and branches off-road. The main visor sits beneath it and seals against the rubber around the eyeport when closed.
Retail listings for this helmet usually carry the code MX702 alongside the Pioneer II name. Our catalogue does the same, which is why some of our listings show both. Read the label inside your own helmet, under the comfort liner or on the strap, and order against what it says.
Read the fixings before you touch anything
Adventure helmets vary in how the peak and the visor are held on, and a careful look costs less than a snapped tab. Raise the visor fully, then look along each side of the shell where the peak and the visor meet it. The table below describes what you are likely to find and what each fixing wants from you.
| What you see on the side of the shell | What it usually is | How to work it |
|---|---|---|
| A screw or thumb-wheel through the edge of the peak | Peak fixing and angle adjuster | Loosen a little on each side in turn, never one side all the way first |
| A small tab or lever beside the visor pivot | Tool-free visor release | Raise the visor to its top stop, press or lift the tab, then ease that end outward |
| A screw through a round cover at the visor pivot | Screw-retained visor pivot | Undo it gradually, keeping each washer and spacer together on a towel |
| A slider on the top or side of the shell | Drop-down sun visor control | Leave it alone for this job; the sun visor stays inside the shell |
If you still have the owner’s leaflet from LS2, it is the final word on your shell. Where the leaflet and this guide disagree, follow the leaflet.
Setting the LS2 Pioneer 2 peak and visor so they never touch
Most complaints about this kind of helmet come from the peak and the visor fighting each other. A peak set too low can rub the top of the visor as it opens, scratching the outer face and stopping it reaching the top detent. A peak set too high stops doing its job in low sun.
Set the peak with the helmet on a table and the visor fully closed. Loosen the peak fixings on both sides just enough for the peak to move, then tilt it until there is a clear gap above the top edge of the visor. Tighten each side a little at a time so the peak stays square.
Now raise the visor through every detent. It should travel all the way up without its top edge touching the underside of the peak. If it touches, raise the peak slightly and test again rather than forcing the visor past the contact point.
Removing and refitting the visor, step by step
The steps below show how to swap the LS2 Pioneer 2 visor with the peak left on. Read them once before you begin so you know where each hand needs to be.
- Put the helmet on a folded towel on a table. A visor dropped from knee height lands edge first.
- Tilt the peak up to its highest setting. This gives you room to see the visor pivots and to lift the visor clear.
- Raise the visor to its highest stop. Release mechanisms are usually designed to line up only at the top position.
- Release one side and draw that end away on a gentle arc. Keep a hand on the visor so it does not swing and load the other pivot.
- Release the second side and lift the visor out from under the peak. Lay it face up on the towel.
- Wipe both pivot areas with a damp cloth. Dust from trail riding collects here and will scratch the new visor or stop the catch closing.
- Offer the new visor to the first pivot at its open angle. Seat it flush and let the catch return under its own spring.
- Seat the second side, then lower the peak back to your chosen angle. Recheck the gap between peak and visor as described above.
If you have not removed a visor on this kind of mechanism before, our general walkthrough on how to remove a motorcycle helmet visor covers the same logic in more depth. The LS2 Advant 2 visor removal guide is worth a look if you own more than one LS2 shell.
Checking the seal after a swap
With the new visor seated, close it and stand in front of the helmet at eye level. The visor should touch the rubber seal evenly from one corner to the other. Daylight at a lower corner usually means a pivot is not fully home on that side.
Take that side off and refit it rather than pressing the visor shut, which only strains the pivot. If the seal itself looks flattened or torn, our guide to cleaning and caring for a visor seal explains what to look for. Leave the protective film on the new visor until the fit is right, then peel it slowly from a corner.
Riding with goggles under the peak
On a dirt section, many adventure riders take the visor off and wear goggles instead. Goggles seal against your face and vent better at low speed, where a closed visor fogs and an open one lets dust straight in. The peak stays on to shade the goggle lens and take the worst of the roost.
Remove the visor as described above and store it somewhere it cannot be scratched, such as a soft bag in a tank bag. Fit the goggles with the helmet on, frame first into the eyeport, then take the strap over the back of the shell. The strap should sit flat and level, and the frame should not press the helmet down onto your nose.
Check that the top of the goggle frame clears the underside of the peak with your head turned both ways. If the frame touches, raise the peak a step. Goggles worn on the road are eye protectors too, so the marking question in the legal section below applies to them as well.
Road, trail or both: choosing your setup
The right setup depends on where most of your miles are. The table below sets the common combinations against the riding they suit.
| Setup | Where it suits | What to bear in mind |
|---|---|---|
| Peak on, clear visor fitted | Mixed road and gravel riding | Set the peak high enough to stop buffeting at motorway speeds |
| Peak on, visor off, goggles | Slow technical trail and hot weather | Carry the visor safely for the road sections |
| Peak off, visor fitted | Long road days at sustained speed | Keep the peak screws together so they are not lost |
| Peak on, photochromic visor | Riders who move between shade and open sun | Darkens in bright sun and turns near-clear again as the light drops |
A peak catches the wind at speed, and the pull on your neck grows quickly with a strong crosswind. Riders who spend long stretches on fast roads often take it off for that leg and refit it for the trail.
Choosing a replacement visor for the Pioneer II
The replacement visors listed for this helmet come in several tints, and the photochromic visor is a separate product. The tint matters more on an adventure helmet than on a road lid, because the same ride can run from forest shade into open desert. The choice is about when and where you ride.
| Option | Where it fits your riding | What to bear in mind |
|---|---|---|
| Clear | Year-round riding | The plain one-visor setup, with the sun visor for glare |
| Photochromic | Riders who want one visor that adjusts with the light | As with any tint, the marking on the visor decides road use, not the name |
| Smoke | Riders who want some tint | Check the marking on the visor itself; the tint name settles nothing |
| Gold and other mirrored finishes | Off-road and track use | Not for use on the road in Great Britain |
If you are undecided, start with a clear replacement visor. Riders who want the tint to look after itself can read how photochromic visors work before choosing from the photochromic visor range.
What the law in Great Britain tests
The legal question is answered by the marking on the individual visor, not by its colour or by what the tint is called. That is why the table above sends you to the visor itself rather than the product name.
Regulation 4(1) of the Motor Cycles (Eye Protectors) Regulations 1999 prescribes eye protectors of “Grade X in British Standard BS 4110:1979”, among other listed standards. It also requires the protector to be “marked with an approved certification mark of an approved body”. BS 4110 is the standard for the visor itself, which is why the marking on the visor is what counts.
Iridium, gold, mirrored and dark-smoke visors transmit too little light to be legal for road use in Great Britain, at any hour. There is no daytime exception for them. Our explainer on iridium and mirrored visor legality sets out the reasoning, and the iridium visor collection is listed for track and off-road riding.
Selling an eye protector as authorised for road use when it is not a prescribed type is an offence under section 18 of the Road Traffic Act 1988. For that reason we describe fitment and tint, and we never certify any individual item. The Highway Code makes the everyday point in rule 83: “check that your helmet visor is clean and in good condition” before each journey (see rules for motorcyclists 83 to 88).
Keeping the visor clear of fog
Adventure riding is hard on a visor: slow climbs, hard breathing and cold mornings all bring fog. Retail listings describe the Pioneer II’s original visor as prepared for an anti-fog insert. Before you buy an insert for a replacement, look for the two small posts near the edges of its inside face.
If your visor has the posts, our range of anti-fog inserts shows which insert is cut for which visor. Fit the insert with the visor off the helmet, which is one more reason to know the removal steps above. Our pillar guide on how to stop a helmet visor fogging covers the airflow side of the problem.
Troubleshooting after the first ride
The first ride after any change to the peak or visor is the real test. These are the faults that show up most often on a peaked helmet and where each comes from.
| What you notice | Most likely cause | The fix |
|---|---|---|
| Helmet lifts or pulls at speed | Peak set too steep and catching the wind | Lower the peak a step, or remove it for long fast stretches |
| Visor will not reach its top stop | Visor edge touching the underside of the peak | Raise the peak until the visor travels freely |
| Fine scratches along the visor’s top edge | Peak rubbing the visor as it opens | Reset the peak gap; a scratched visor needs replacing |
| Whistle or draught across the eyes | Visor not seated evenly on its pivots | Remove and refit the side that sits proud |
| Peak works loose on rough ground | Fixings tightened unevenly | Snug both sides a little at a time, then recheck after the next ride |
Rule 84 of the Highway Code puts the stakes plainly: “Scratched or poorly fitting eye protectors can limit your view when riding, particularly in bright sunshine and the hours of darkness”. A visor scored by a low peak is exactly that kind of eye protector.
Ordering the right part for your helmet
Visors are cut for a model, so start from the name and code on your own helmet. Match it to the LS2 Pioneer II visor page or the LS2 MX702 visor page, which list the parts recorded against each name. A part listed only for the original Pioneer is not evidence that it fits the Pioneer II.
If you own other LS2 helmets, the full LS2 helmet visor range and our overview of visors that fit LS2 helmets are the places to compare. Unsure which model you have? The ClearLine visor finder starts from the helmet rather than the part.
Visors and inserts mentioned in this guide
- LS2 MX702 / Pioneer II Replacement Visor — Smoke, Clear, Gold Tints
- replacement visor for the LS2 Pioneer II
- See the LS2 Pioneer II Photochromic Visor
- every LS2 Pioneer II visor in one place
- anti-fog inserts by visor
Written by the ClearLineMoto team, who spend most of their week reading fitment data.
Frequently asked questions
Can I remove the visor on the LS2 Pioneer 2 without taking the peak off?
Usually yes. Tilt the peak to its highest setting first so you can see the visor pivots and lift the visor out from under it. Raise the visor to its top stop before you release either side.
Why does my visor hit the peak when I open it?
The peak is set too low for the visor’s travel. Loosen the peak fixings a little on each side, raise it until the visor opens fully without touching, then tighten both sides evenly.
Can I wear goggles with the Pioneer II?
Many riders take the visor off and wear goggles under the peak for trail riding. Check that the goggle frame clears the peak and that the strap sits flat on the back of the shell. Goggles worn on the road are eye protectors, so the same marking question applies.
Can I use a tinted Pioneer II visor on the road?
It depends on the marking on that individual visor, not on the tint name. An eye protector has to be of a prescribed type and carry an approved certification mark to be authorised for road use in Great Britain. Iridium, gold, mirrored and dark-smoke visors transmit too little light to be legal for road use at any hour.
Should I ride with the peak on at motorway speeds?
You can, but a peak catches the wind and the pull on your neck rises with speed and crosswind. Lower it a step, or take it off for long fast stretches and refit it before the trail.
What should I check for LS2 Pioneer 2 peak replacement compatibility?
Start from the model name and code on your helmet label, Pioneer II or MX702. LS2’s own Pioneer II page lists a peak among that helmet’s accessories (checked on 11 November 2026). We list visors for this helmet, not peaks, so we cannot say whether a particular peak fits.
Is the LS2 Pioneer 2 visor Pinlock ready?
LS2 says so for the helmet’s own visor. Its Pioneer II page lists the helmet as ready for a Pinlock 70 MaxVision insert (checked on 11 November 2026). Our replacement visor pages do not say the same of a replacement, so look for the two small pins on the inside face of the visor before you buy an insert.
Where can I buy an LS2 Pioneer II tint visor?
We list replacement visors for the LS2 Pioneer II, including the LS2 MX702 / Pioneer II replacement visor in clear, smoke and gold tints. Match the listing to the model name and code on your helmet before you order. Iridium, gold, mirrored and dark-smoke visors are not road legal in Great Britain, day or night, and for any tint the marking on the individual visor decides road use, not the tint name.
Which LS2 Pioneer 2 clear shield replacement should I get?
On the replacement visor for the LS2 Pioneer II listing, choose the clear option, which the product page describes as no tint. Road use still depends on the marking on the visor you receive, so check it.
Is there an LS2 Pioneer 2 dual sport peak vibration fix?
This guide has no separate vibration fix, and LS2’s Pioneer II page gives none either (checked on 11 November 2026). The troubleshooting table does cover two peak faults. If the peak works loose on rough ground, snug both sides a little at a time and recheck after the next ride. If the helmet lifts or pulls at speed, lower the peak a step, or take it off for long fast stretches.